RabbitMQ on Raspberry Pi

Playing around with RabbitMQ lately, I was interested how it would perform on a very small box, a
Raspberry Pi.

Here is a short description how to get RabbitMQ running on a Raspberry Pi.

  1. get a Raspberry Pi installed with Raspbian – just follow the standard installation guide from http://www.raspberrypi.org/downloads/
  2. get the rabbit MQ package from here: http://www.rabbitmq.com/install-debian.html
  3. I wanted to run a client in Node.js, so I got the latest node with these commands:

    wget http://node-arm.herokuapp.com/node_latest_armhf.deb
    sudo dpkg -i node_latest_armhf.deb
    node -v
  4. pick the node version of the RabbitMQ tutorials from here: https://github.com/squaremo/amqp.node/tree/master/examples/tutorials

Here is how this looks in pictures:

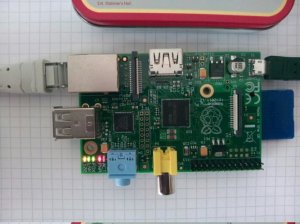
Raspberry Pi running RabbitMQ

Raspberry Pi running RabbitMQ

node.js client running with rabbitMQ on a Raspberry Pi

node.js client running with rabbitMQ on a Raspberry Pi

And the results: If you let a publisher with a simple “hello world” message run in a loop for 1000 times and start a subscriber for this queue at the same time, you will see the 1000 messages flying through your little Rabbit Pi in about 13 seconds, more than 50 messages per second!

You will also notice that there is hardly any concurrency between the publisher and subscriber, so the messages only get consumed when the publisher gets idle. This is contrary to what I see on a desktop linux system where the subscriber always “wins” and keeps the queue empty, and the publisher is slowed down to the pace of the subscriber.

You probably do not want to push the little Raspberry to many messages per second, but it is nice to know that you can!

Installing Ruby and Jekyll

Now, this is my first step in the Ruby world, so apologize if I am doing dumb things here.

On a Mac  Ruby was preinstalled, but on Linux 13.10 I needed to do this before installing Jekyll.

First step:

$ sudo apt-get install ruby1.9.1

this installs a few things around ruby, but you also need:

$ sudo apt-get install rubygems1.9.1

this installs the gem processor, and we should all be set, then:

$ sudo gem install jekyll

tries to fetch a few things and then builds everything for jekyll.

Last step is to go to the directory of your jekyll project

$ jekyll serve

This fires up jekyll in a webserver on http://localhost:4000

Done.

Enough for today, stay tuned.

Cheers, Tobias.

Raspberry Pi and Akka / Scala

This post is about running Akka on the Raspberry Pi, but because this is so simple to do I will also talk about a simpler development and deployment process.

Clearly from the posts before you can see that the Java JVM on Raspbian is not very fast, so I looked at a process of developing a Scala / Akka application on my Linux desktop and just copy it to the Raspberry Pi as a Jar file and execute there, to remove the tedious wait during the compilation of my source code.

Continue reading

Raspberry Pi and Scala: The Typesafe Stack

Following on from my earlier post I wanted to get the the full Typesafe Stack on my little Raspberry Pi.

So here we go:

according to the documentation on the Typesafe website you should use the “Universal install”, i.e. download a tarball and copy it to a place of your choice.

wget http://downloads.typesafe.com/typesafe-stack/2.0.2/typesafe-stack-2.0.2.tgz
tar xovzf typesafe-stack-2.0.2.tgz
sudo mv typesafe-stack /opt
chown -R bin.bin /opt/typesafe-stack

Continue reading

Raspberry Pi and Scala

This is a little experience report how to bring up Scala on my RaspberryPi

Raspberry Pi Image

Step 1: Java

I have connected my Raspberry only with power and network (no keyboard/mouse/display) for now and log in via ssh from my Linux desktop. Not only to save cables on the desk, but also to allow copy and paste between desktop and RaspberryPi. I am running Raspbian wheezy 2012-08-16 downloaded from the Raspberry website.

Continue reading